I’ve been playing more and more with embossing powders. The first I purchased was black, and it took some practice to get used to it. Then I bought some metallics, and I started picking up any jars that were on clearance…which led me to my all-time favorite: the clear chunky embossing powder. I’ll save that for the end.
So, for beginners, what am I talking about? Embossing powders are like tiny jars of fine, powdery plastic that can stick to a gluey or wet image. When heated, the powder melts unto a shiny plastic design. Most people use them on rubber stamped images, but you can cover entire cards, the edges, or images you draw. The powder will come in a small jar.
To make a sticky surface, you can use regular a regular inkpad. I often do this if I am embossing in the same color as the ink (especially black). But if you are using a clear powder or something where you don’t want ink under it, you can buy pads that are just for glue. I learned this the hard way: there is a reason so many crafters talk about Versamark pads. It’s because they are awesome. The others just don’t stick as well.
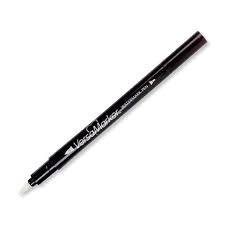
You can also get a Versamark pen for drawing an image to emboss. They are well worth the investment.
On this ATC, I used the pen to draw waves, then used clear embossing. I added alcohol inks over it, but the embossed area acted as a relief by not accepting the ink:
Another lesson I learned: don’t use dirty stamps. The ink will transfer to your pad and you will no longer be stamping clear. I keep baby wipes on hand and a tiny bottle of stamp cleaner. I try to remember to wipe a stamp with a baby wipe as soon as I’m finished, but if I forget I can squirt some cleaner on to remove dried ink.
So, stamp your image, then pour the powder over it. Don’t be stingy, dump it on. Some crafters keep their powders in large containers and spoon it over. I may end up that route for clear powder, but for my colors I just do it over a blank sheet of paper. I pick up the item, and pour the excess onto the paper. I tap the edges and give it a thump on the back to remove the loose powder. If powder is sticking somewhere I don’t want it, I keep a small dry paintbrush on hand to brush it away. I set the ATC on a heat resistant mat, bend my big sheet of paper into a funnel and carefully pour the excess powder back into the jar.
Then I grab my heat gun, warm it a bit, and start melting the powder. You can usually tell when it’s done because it gets lighter and shiny, unless it’s a puffy or matte type. Easy peasy permanent embellishment.
Now, I promised to tell you about the chunky clear embossing powder. It is great for covering an entire card if you want it to appear to have water droplets or be under water, as I have done on this ATC:
The more powder, the thicker and more “underwater” it appears. If you only want water droplets, this is where the cheaper glue pads are helpful. I use those and smash them randomly over the ATC, then pour on the powder. Not as much sticks as it would with the Versamark, and the air from the heat gun blows some off, too. Then you end up with water droplets, as I have on this ATC:
I hope this helps to take away some of the fear of using embossing powders, and frees you to experiment!


